

How to Properly Fix Fire Hydrant and Restore Its Normal Working Performance
A fire hydrant is a critical component of any community’s fire protection infrastructure. Often taken for granted until an emergency arises, these stalwart sentinels must be in perfect working order to provide the immediate, high-volume water supply firefighters need to save lives and property. Proper maintenance, timely repair, and professional restoration are not just recommendations—they are necessities for public safety. This guide outlines the essential steps to properly fix a fire hydrant and restore its peak operational performance.
Understanding the Importance of Functional Fire Hydrants
Before delving into repair procedures, it’s crucial to understand why a malfunctioning hydrant is a significant risk. A single inoperable or underperforming hydrant can delay firefighting efforts, reduce water pressure, and compromise the entire response to a fire. Regular inspection and proactive maintenance are the first lines of defense. Common signs of a problem include low or no water output, visible leaks around the base or outlets, difficulty operating the stem nut, damaged caps or threads, and corrosion.
The Role of Professional Service Providers
While some basic maintenance can be performed by municipal staff, most repairs—especially those involving internal components or major excavation—require specialized tools, training, and parts. This is where partnering with an experienced fire protection company becomes invaluable.
Introducing Hydrotek Fire Systems LLC
Hydrotek Fire Systems LLC is a premier provider of fire protection solutions, specializing in the inspection, testing, maintenance, and repair of fire hydrants and water supply systems. With decades of combined experience, our certified technicians are experts in diagnosing hydrant issues and executing repairs that comply with all local standards and National Fire Protection Association (NFPA) guidelines. We service municipal, industrial, and commercial clients, ensuring their fire hydrant networks are reliable and ready for action. At Hydrotek, we don’t just fix problems; we restore confidence in your fire protection infrastructure.
Step-by-Step Guide to Proper Fire Hydrant Repair
Step 1: Safety First and System Isolation
The first and most critical step is to ensure the safety of personnel and the public. Set up proper traffic control and work zone signage if the hydrant is near a roadway. Before any work begins, the specific hydrant must be isolated from the main water supply. This typically involves locating and closing the appropriate valve on the supply line, often found in a nearby “valve box.” It is imperative to verify the isolation by attempting to open the hydrant and confirming no water pressure is present.
Step 2: Comprehensive Diagnosis and Assessment
Once the hydrant is safely isolated, a thorough inspection is conducted. This involves:
Removing the outlet caps and inspecting threads for damage.
Operating the hydrant stem to feel for stiffness or breakage.
Checking for visible leaks, corrosion, or physical damage to the barrel and base.
Using specialized tools for internal camera inspection when needed.
This diagnosis determines the exact repair scope, whether it’s a simple seal replacement or a full hydrant overhaul.
Step 3: Disassembly and Component Inspection
The hydrant is carefully disassembled. The operating stem nut is removed, allowing the stem assembly to be extracted. The main valve (attached to the bottom of the stem) is inspected for wear, corrosion, or debris. All O-rings, gaskets, and packing materials are examined. Each component is cleaned and assessed for reuse or replacement.
Step 4: Repair and Replacement of Faulty Parts
Based on the assessment, faulty components are replaced with new, manufacturer-specified parts. Common repairs include:
Replacing the main valve rubber or seal.
Installing new stem O-rings and packing to prevent leaks around the stem.
Replacing damaged outlet nozzles or repairing threads.
Addressing any corrosion on internal mechanisms.
For hydrants with a damaged barrel or broken base below ground, excavation (“digging down”) is required to expose the lower pipe connection for repair or replacement—a complex task that underscores the need for professional service.
Step 5: Reassembly, Lubrication, and Testing
After repairs, the hydrant is meticulously reassembled. All moving parts are lubricated with a water-resistant grease designed for potable water systems. The outlet caps, with their chain(s) attached, are reinstalled with new rubber gaskets to ensure a tight seal. The isolation valve is then slowly reopened to pressurize the hydrant.
Step 6: Performance Testing and Flow Measurement
The final and most crucial phase is testing. A trained technician will fully open the hydrant and measure its static and residual water pressure, as well as its flow rate (in gallons per minute). This data is compared against the system’s required performance and historical data for that hydrant. The test ensures the repair has not only stopped leaks but has also restored the hydrant’s full flow capacity. All findings are documented in a detailed service report.
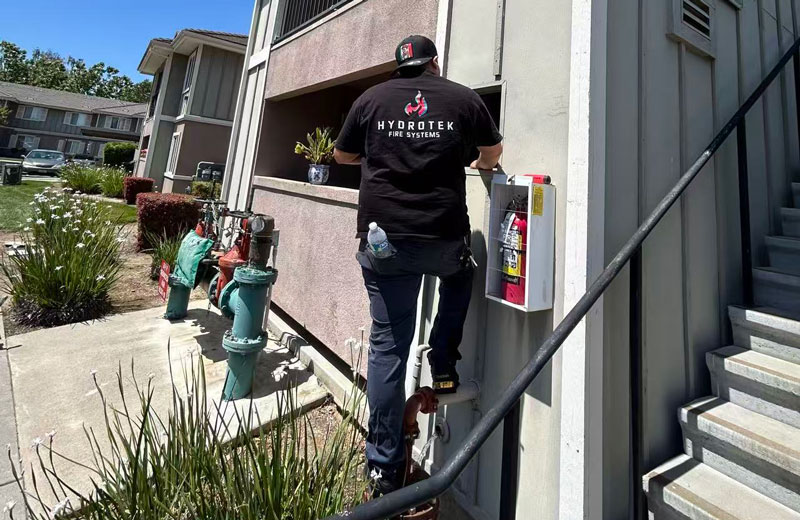
Common Customer Problems Identified by Hydrotek Fire Systems LLC
Through our extensive field work, Hydrotek technicians frequently encounter these recurring issues:
1. Leaking Stem or Seepage at the Outlets
This is often caused by worn stem packing or O-rings. While it may seem minor, a leaking stem can freeze in winter, rendering the hydrant completely inoperable. It also leads to water waste and potential property damage.
2. Difficult Operation or Frozen Stem
Hydrants that are hard to open usually suffer from lack of maintenance. Corrosion, mineral buildup, or old, hardened grease inside the mechanism can seize the stem. Regular exercise (fully opening and closing) and lubrication prevent this.
3. Low Water Flow or Pressure
This serious problem can stem from a partially closed isolation valve, a obstructed or damaged main valve inside the hydrant, or issues in the supply piping itself. It requires immediate professional diagnosis.
4. Damaged Outlet Caps and Threads
Dropped caps or cross-threading by connecting hoses can damage the crucial mating surfaces. Damaged threads prevent firefighters from connecting hoses securely, creating a dangerous situation.
5. Barrel Damage from Vehicle Impact
A common issue requiring immediate attention. Even if the hydrant doesn’t leak, the impact may have damaged the internal stem or piping below ground, which can fail catastrophically when needed.
Proactive Maintenance is Key
Properly fixing a fire hydrant is a systematic process that demands expertise, correct tools, and genuine parts. The goal is not just to stop a leak, but to restore the hydrant to its original design performance. Relying on professionals like Hydrotek Fire Systems LLC ensures repairs are done safely, correctly, and in compliance with all regulations.
The most effective strategy, however, is a proactive one. Implementing a regular schedule of inspection, testing, and maintenance (ITM) will identify minor issues before they become major failures. By partnering with a dedicated service provider, you ensure that every fire hydrant under your responsibility remains a reliable guardian of community safety, ready to perform at a moment’s notice. Don’t wait for an emergency to discover a problem—invest in regular care and professional repair for your fire hydrant system today.